

Manage Scenario Locations
Once a scenario has been created, you can add more locations to its list or remove them as long as the Automatically add all active locations scenario setting is disabled. You can always rank locations to determine the order of priority regardless of that setting.- Go to the List Strategies page and click the Edit icon on a strategy.
- Click the Edit icon on a scenario.
- The Locations table is found on Step 2 of the scenario configuration flow.
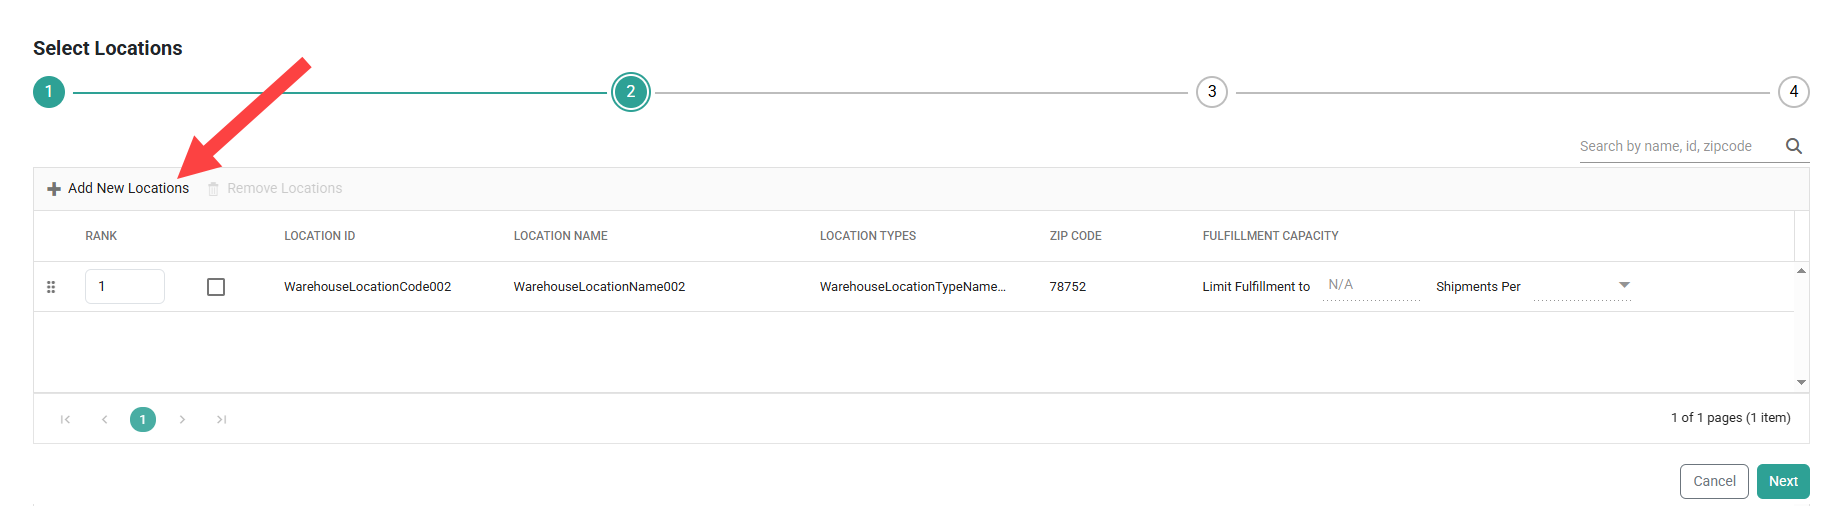
- Click Add New Locations to open a pop-up with a list of all active fulfillment locations. This displays their basic identifying information, zip code, and fulfillment capacity if any shipment limits were configured in the Admin UI.
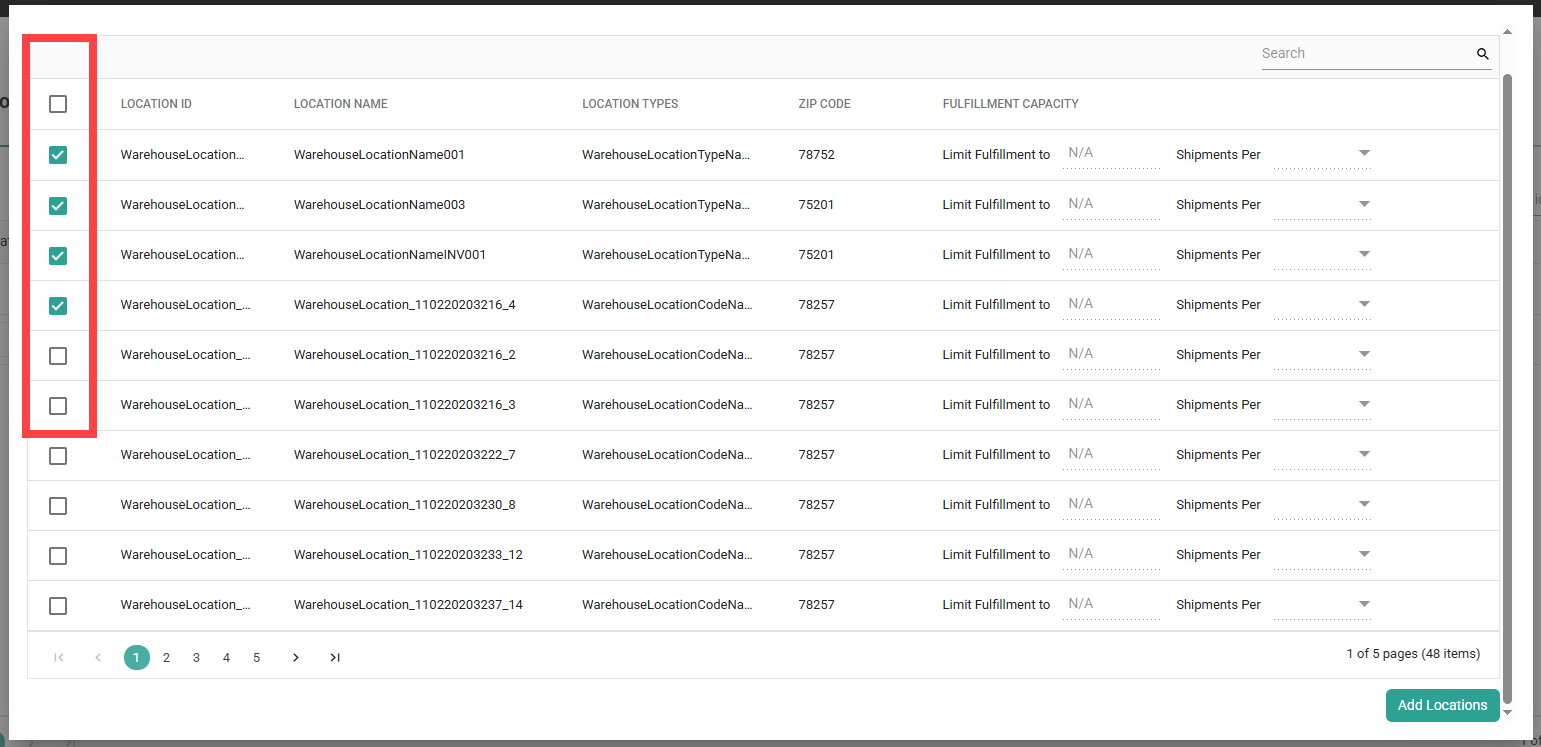
- Click the checkboxes of all locations you want to add to the scenario and then click Add Locations. Use the search bar in the top right to quickly find specific locations if needed.
- To remove one or more locations, click their checkboxes and then Remove Locations. Use the search bar in the top right to filter the table by a location name, zip code, or ID using the search field in the top right.
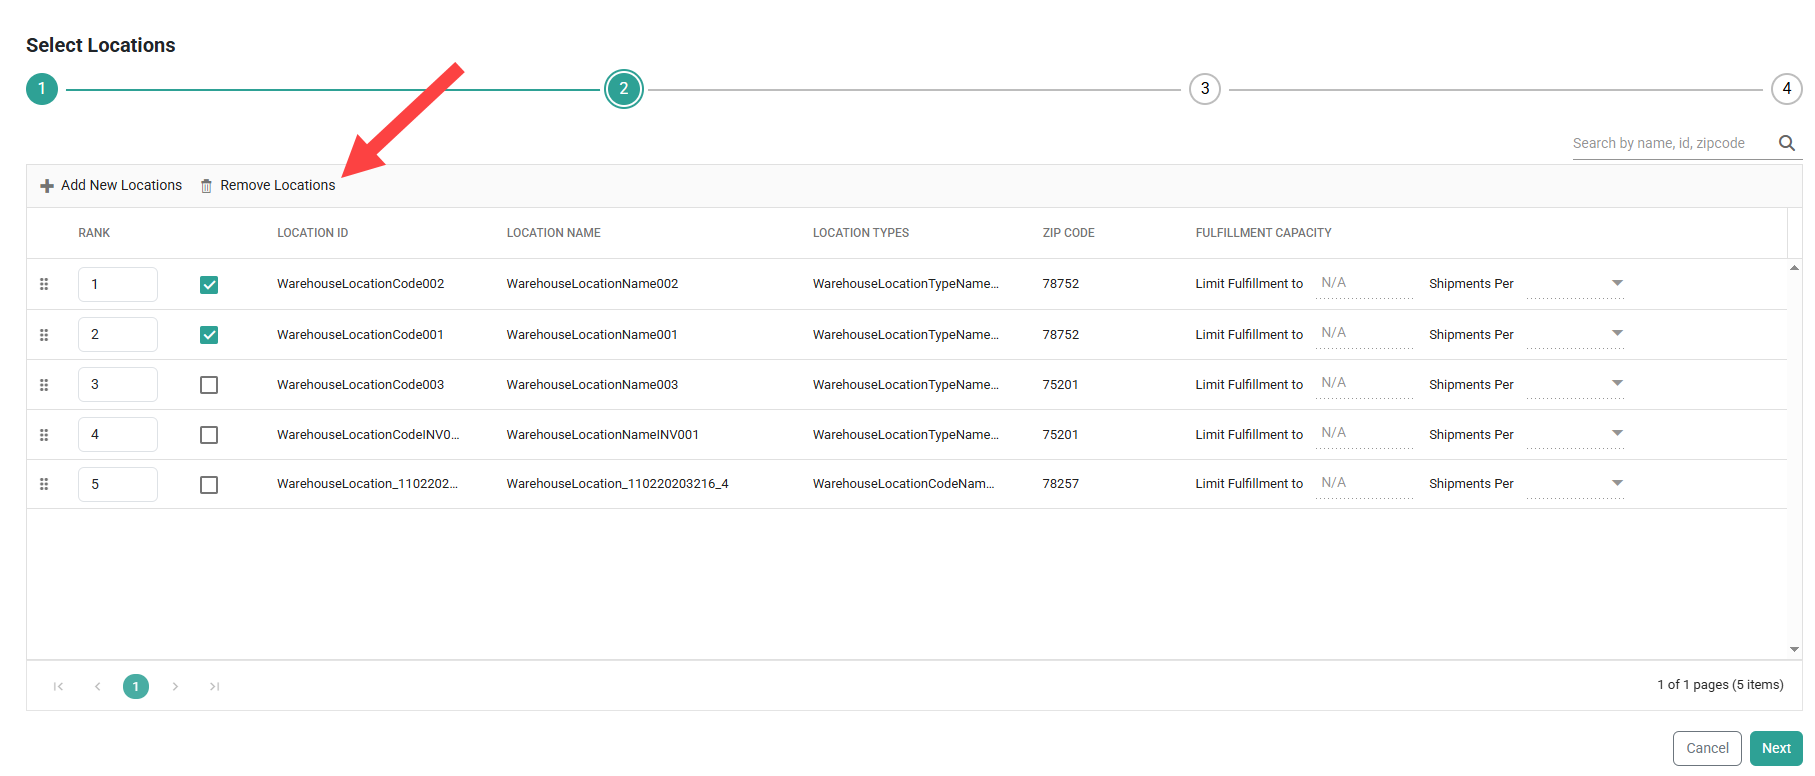
- Enter a numeric Rank or click and drag the table rows to determine the priority in which locations are assigned to.
- Click Save on Step 4 of the configurations to save the location(s) to the scenario.